The Pane Volumes
macOS follows the strategy to automatically detect all disk drives and all their volumes currently connected to the computer, making them active and visible on the user interface. This might not be useful in certain situations, for example when you have a Linux partition on your computer which you don’t need when working with macOS, or when you keep a backup copy of your system in reserve on a secondary disk drive. With the help of TinkerTool System, you can tell macOS not to activate (“mount”) specific volumes automatically.
Additionally, you can control options to prevent programs from being launched on a specific volume. This is useful when connecting a drive from a different operating system. You can also configure a volume to still mount automatically while ensuring it remains hidden from the graphical user interface (GUI). These three options are organized into separate categories
- automounting,
- execution, and
- visibility
which are described in more detail below.
In all cases, macOS must have a way of reliably referring to each drive and volume. This is done by so-called Universal Unique Identifiers (UUIDs), a sequence of characters like 7F176A72–72B2–3D69–19FC–27ABBEFA662D which are guaranteed to be unique for every volume of every disk drive in the world. You don’t need to enter these UUIDs by hand. TinkerTool System automatically finds out the UUIDs and helps you to identify the drives by specifying their current volume names and file systems.
Because UUIDs are difficult to read, TinkerTool System tries to avoid their use. Whenever technically possible, the program displays the volume names rather than their UUIDs in the settings for volumes. This can, however, lead to confusion if you have given multiple volumes the same name. Additionally, once a volume is no longer automatically mounted, macOS can no longer determine its current name. Confusion may therefore occur if a name changes after you have made an adjustment to a volume setting in TinkerTool System. The program remembers the mapping of (former) volume names to UUIDs per user. If a different user attempts to change a volume setting, only the UUID is available, and no name for the volume can be retrieved. It is therefore advisable to adhere to the following guidelines:
- Assign unique names to all volumes, e.g., via Finder or Disk Utility.
- Do not change a name after making an adjustment to a volume setting in TinkerTool System.
- Always manage volume settings from the same user account.
As mentioned before, all volumes mounted manually or by a user program remain unaffected by the settings in the table. Either such volumes are directly excluded by TinkerTool System because they are detected as not being compatible, or adding such volumes wouldn’t have any technical effect, because macOS only indirectly processes the mount operation. An example for mounting by user applications is Apple’s technology FSKit (File System Kit) or the third-party software macFUSE (Macintosh File System in User Space). In some versions of macOS, FSKit is used by default to process foreign file systems such as ExFAT or NTFS. Apple’s usage of FSKit may vary in each version of macOS.
You can manage the three adjustment options mentioned above either through individual tables for each, or via a single combined summary table. This fourth table also allows you to verify the current mapping between volume names and UUIDs if in doubt, whenever technically feasible.
Automounting
Perform the following steps if you like to exclude volumes from automatic mounting:
- Open the sub-item Automounting on the pane Volumes.
- Click the [+] button below the table.
- In the dialog sheet, select one or more disk volumes that should not be automounted and click OK.
- After all volumes have been set as intended, click the button Apply in the lower right corner of the window.
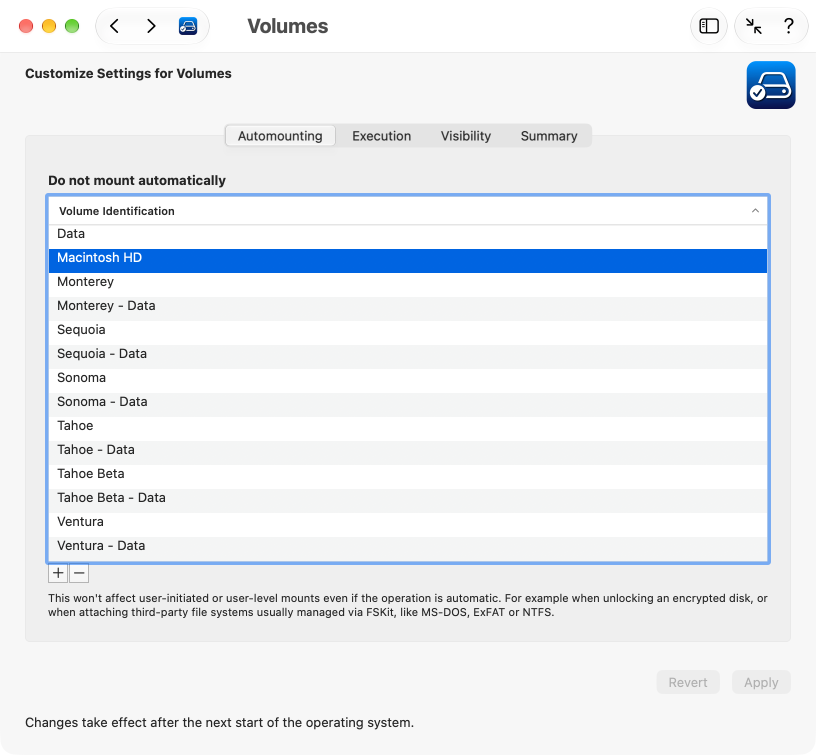
This setting only takes effect for purely automatic mount operations. If you are using an encrypted disk, macOS will always try to determine whether this disk contains volumes, and this disk has no readable identification (because it is encrypted). When you enter the password for unlocking, or the Keychain provides it, the corresponding volumes will be mounted, because this is a manual activation of this disk.
Execution
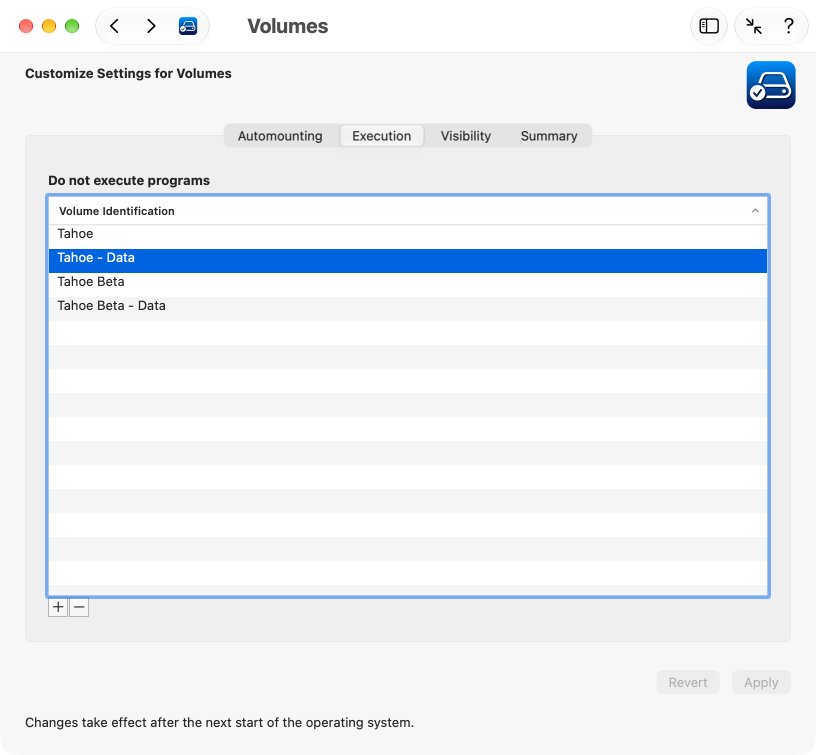
Another independent option allows you to choose whether the system should allow the execution of programs which are stored on specific volumes. This feature can be useful if you connect “foreign” drives to your system that contain applications written for other operating systems, incompatible with macOS. You can no longer mistakenly try to open programs on such drives.
Perform the following steps if you like to use this feature:
- Open the sub-item Execution on the pane Volumes.
- Click the [+] button below the table.
- In the dialog sheet, select one or more disk volumes that should be blocked from program execution and click OK.
- After all volumes have been set as intended, click the button Apply in the lower right corner of the window.
Visibility
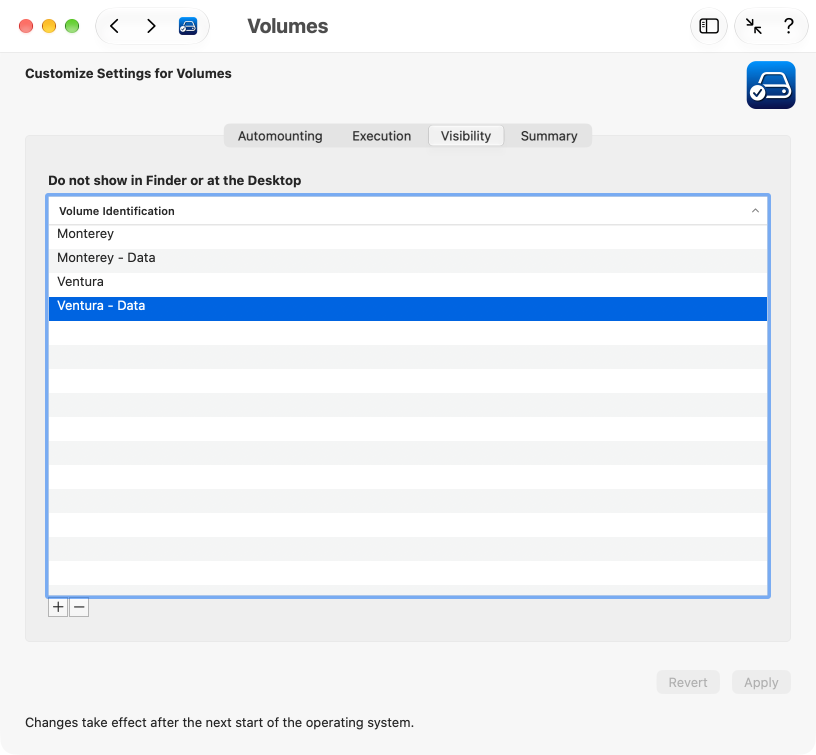
Finally, a third option allows a volume to be automatically activated while suppressing its display on the graphical user interface. The volume is usable but hidden. This can be practical if you only want to use certain volumes in conjunction with specific applications that inherently “know” they should work with data on the corresponding drive, but manual user access to the data isn’t required, or should even be explicitly avoided. Suppressing the display affects:
- Finder windows,
- the Finder’s Desktop feature, and
- dialogs for opening or saving files.
The volume remains visible
- in Disk Utility,
- on the non-graphical interface, such as in Terminal,
- in indirect references, for example through aliases or through the Finder sidebar.
Perform the following steps if you like to use this feature:
- Open the sub-item Visibility on the pane Volumes.
- Click the [+] button below the table.
- In the dialog sheet, select one or more disk volumes that should be hidden and click OK.
- After all volumes have been set as intended, click the button Apply in the lower right corner of the window.
Summary
As mentioned before, the fourth table summarizes all three options in a single overview. By clicking the entries, further details about the respective volume can be retrieved.
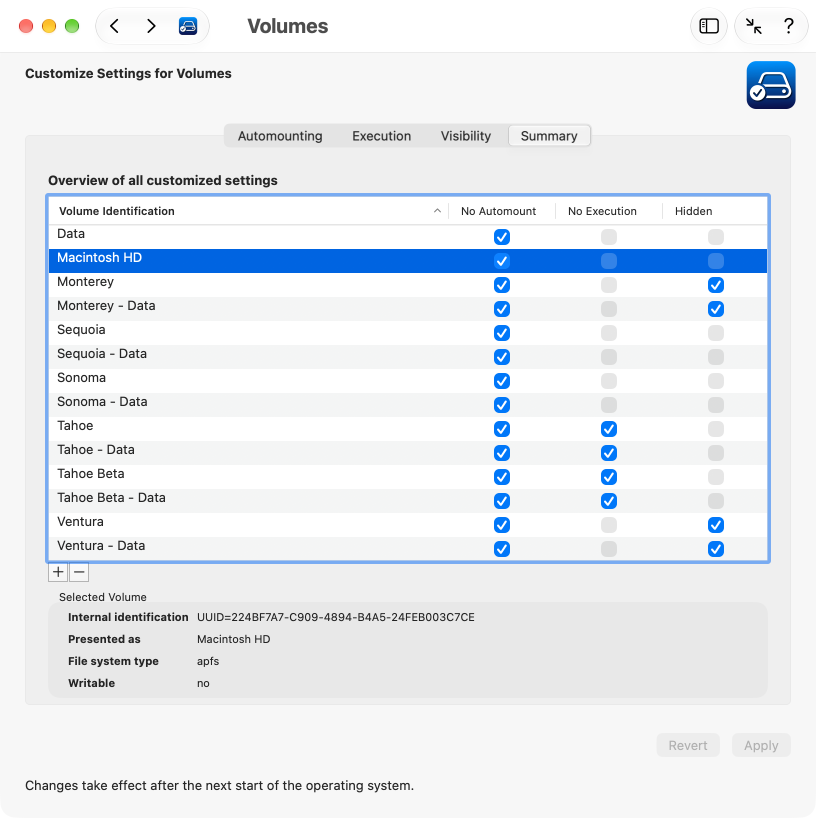
Perform the following steps when you like to exclude certain disk volumes from automatic mounting, execution of programs, or presentation on the graphical user interface:
- Open the sub-item Summary on the pane Volumes.
- Click the [+] button below the table.
- In the dialog sheet, select one or more disk volumes that should be operated with custom settings and click OK.
- Check or uncheck all options that should be enabled or disabled, respectively.
- After all volumes have been set as intended, click the button Apply in the lower right corner of the window.
Volumes without any customized settings are automatically removed from the table when applying the changes. For newly added entries, the option No Mount is selected by default, as it is most commonly used in practice.
Further Information
It is also possible to drag volumes from the Desktop or the Finder’s computer folder directly into the tables. You can remove one or more volumes by clicking the [—] button below the respective table, and saving your modifications. To discard your changes and return the tables to the state currently established in macOS, click the Revert button.
When you excluded volumes from automatic mounting, TinkerTool System will ask you whether you like to eject the affected volumes immediately after applying the changes.
If you have additional copies of macOS installed on your Mac, and you added one or more system volumes containing macOS 11 or later to an exclusion table of the system you are currently running, you may notice that the table entries for these volumes no longer take effect after you have performed an update or upgrade on the related system volumes. This is the correct and expected behavior because a modern macOS update deletes the previous system volume and adds a new one with the same name.
TinkerTool System can assist here: When the application detects this specific situation, the additional button Update system volumes… will automatically appear below the table. Click this button to review the affected entries. After clicking Update table, the identifications of the affected system volumes will be updated automatically to reflect the new configuration. The update button won’t be available when you begin to edit the table manually.